
Thursday, July 12, 2012
Where did the time go?


Monday, March 21, 2011
Frenching the rear emblem(part 2)

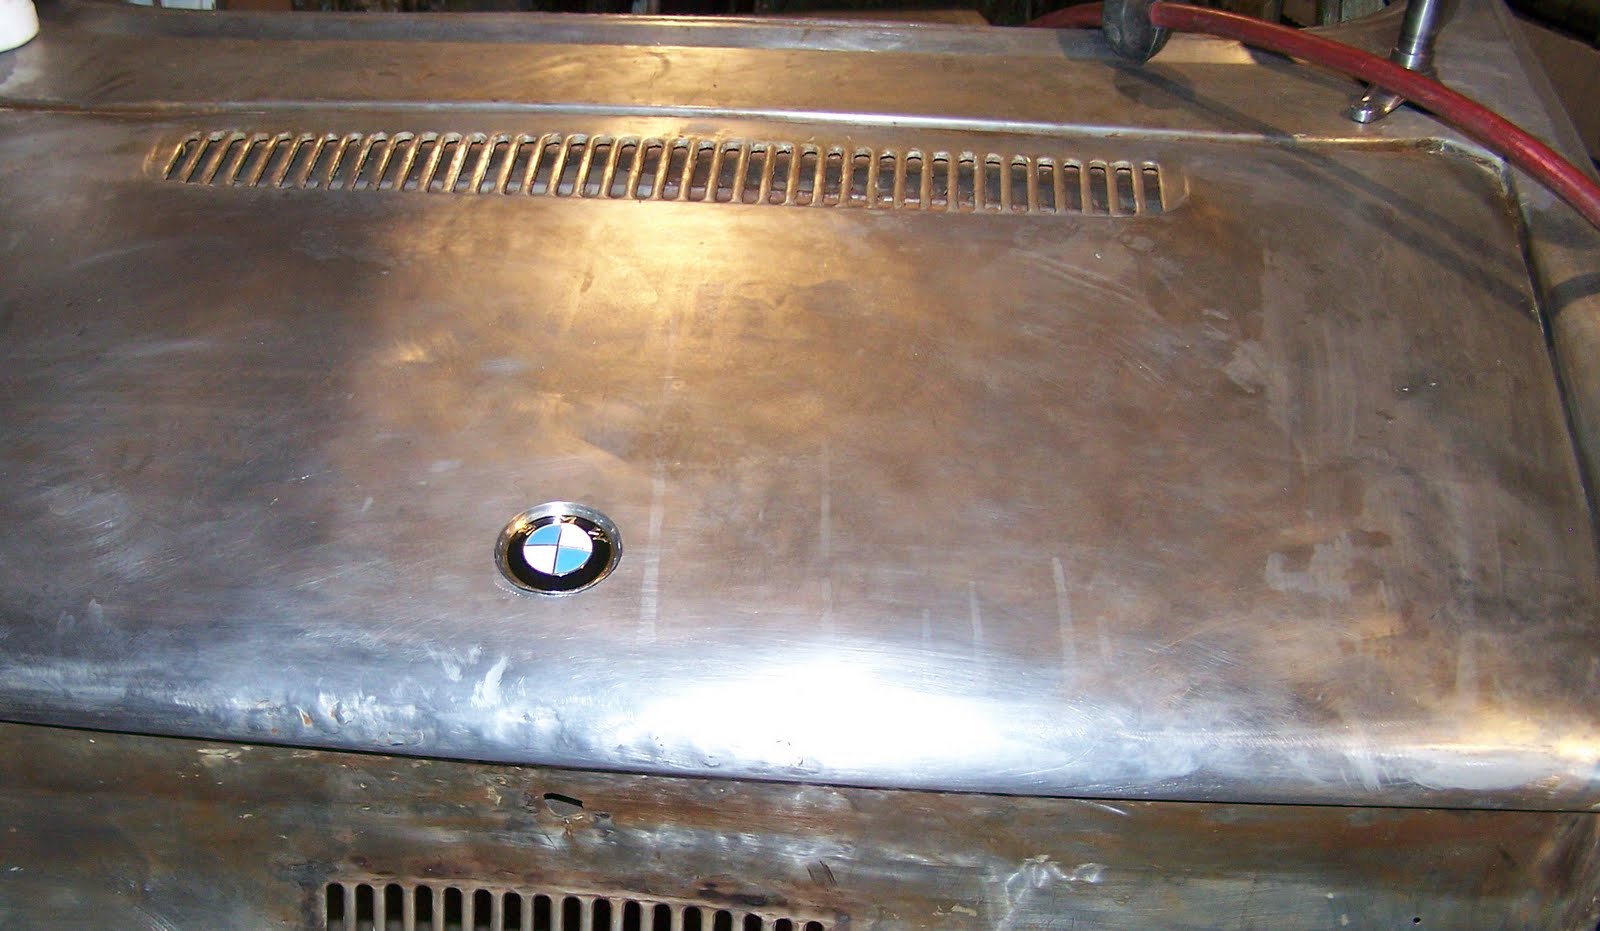
Tomorrow turned into today, and today turned into last week. Anyway, I got a 68mm hole saw from Home Depot, drilled a pilot hole dead center and proceeded to cut a hole in our new(to this car) deck lid. The O.D. of the piece I'm welding in almost 70mm, so I had a little room to fudge it if the hole wasn't dead center. And what do you know it was off a tiny bit. After some measuring and hand filing I had it dead center and ready to weld in place. In these pics, you mat notice that I also welded up the rear facing part of the lid where the license plate light used to be. I decided that it looked way better without that chrome trim/light piece at all, and removed it. I'm not going to be running the license plate there anyway. Hopefully I'll be back soon with part 3, welding and grinding the part in place.
Friday, February 25, 2011
Frenching the rear emblem(part 1)


I really like the look of the rear on cabriolet 700's. They have only a BMW roundel on the decklid and none of the extra badging the others use. I decided to "french" the emblem into our lid in the same spot as the cabrio. I started with a DIY exhaust megaphone, and a hand cut piece of 18 gauge sheet in the shape of a circle 1mm larger than the roundel. I centered the roundel in the circle, centered the circle in the tube and then welded it. I removed the excess tube, ground down the weld and now have a piece that is ready to be welded into the decklid. Tomorrow I'll cut the hole in the lid, weld in the piece, and grind it all smooth. The current depth is about twice what I have planned as the final depth when done.
Thursday, January 27, 2011
Brake master cylinder


Today I rebuilt the master cylinder for the brake system with a kit I got from Germany a while back. I started by degreasing the body and knocking off the rust with some 100 grit sandpaper. I lightly polished the exterior of the cylinder on my bench buffer with a spiral pad, leaving most of the sand casting pits to give it a shiny but cast appearance. I heavily sanded and polished the forked piece and pin that connect to the brake pedal. I am planning on having carpeting, but will be leaving the pedal box exposed, so I needed these pieces to look nice and shinny. I then etched the inside of the cylinder with muriatic acid and cleaned it with a rolled up scotch brite pad. Next, I thoroughly rinsed all the parts including the new rubber bits from the rebuild kit in warm soapy water. I blew it all dry with compressed air and started the rebuilding part. Assembly was a breeze, even with the German language instructions. The only part I re-used was the rubber boot on the top where the reservoir feeds the cylinder. Unfortunately it did not come in the kit. Afterwards, I covered the ports in masking tape to keep debris out and put it in the done pile.
Tuesday, December 21, 2010
Paint it black

Just picked up some suspension parts at the powder coater this afternoon. Rear springs, sway bar and sway bar brackets.
Monday, November 1, 2010
Adding some Nardi


I had been looking to the 700RS spyder(top pic) for inspiration and found it in the form of this Nardi mahogany steering wheel off e-bay. I backed it up with a matching shifter knob just to add some continuity. I'm still not sure weather or not to use the BMW logo'ed horn button, especially since the 700's horn is on one of the column switches and not on the wheel itself. Next step is fabricating a steering hub adapter which is not available for this model(big surprise).
Interior panels

The original interior and door panels were in pretty rough shape. I salvaged some trim from the two full sets of panels included with the car and had S & S Upholstery in Longmont make up some new panels using some matching leatherette material we got from Stefan when he made our seats. They use identically spaced pleats as the new seats. They also look so much better than the plastic covered stock panels and are one more piece in the process of converting the interior to black. I still have to figure out what I'm gonna do to cover the rear seat pan now that there isn't a seat there. I'll probably get a matching panel mounted to the top just to finish it off a bit more.
Subscribe to:
Posts (Atom)